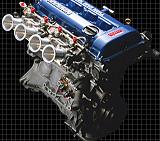
bon voila le fameux swap du sr20det dans comme exemple une primera P10 enfin infiniti G20 ici, ce qui est relativemetn identique pour 100nx, sunny gti, almera gti
source
![[Image: oldeng2.jpg]](http://home.san.rr.com/gtirg20/oldeng2.jpg)
First thing you need when doing a swap is motivation. In my case, motivations came in the form of some bent valves. A very small hole in my radiator led to a very large problem
![[Image: oldeng.jpg]](http://home.san.rr.com/gtirg20/oldeng.jpg)
Pretty ugly, huh
![[Image: Neweng.jpg]](http://home.san.rr.com/gtirg20/Neweng.jpg)
![[Image: neweng2.jpg]](http://home.san.rr.com/gtirg20/neweng2.jpg)
Here's a good cure for the "blown motor blues", a brand new used engine!!! In beautiful condition might I add
![[Image: Ratchet.jpg]](http://home.san.rr.com/gtirg20/Ratchet.jpg)
While pulling off your axle, be sure to take caution, 1/2 inch of craftsman steel is not as strong as it appears.
![[Image: Breaker.jpg]](http://home.san.rr.com/gtirg20/Breaker.jpg)
Even in Breaker Bar form
Driveshaft: 2
Mechanic: 0
![[Image: Driveshaft.jpg]](http://home.san.rr.com/gtirg20/Driveshaft.jpg)
So I gave up on pulling out the driveshaft... but I still yanked it out of the transaxle and continued on. Notice the jackstands, 26-inch tall jackstands allowed me to slide the old engine out, and slide the new engine in.
![[Image: Unsafe.jpg]](http://home.san.rr.com/gtirg20/Unsafe.jpg)
This is the wrong way to jack up your car. DO NOT TRY THIS AT HOME.
![[Image: Garage.jpg]](http://home.san.rr.com/gtirg20/Garage.jpg)
Out with the Old, In with the new. Now comes the all important preparation stage. Doing the right thing here, can save you countless hours of agony later on down the road. I found a place which sold me the stand and the crane new in boxes for $220
![[Image: flywheel.jpg]](http://home.san.rr.com/gtirg20/flywheel.jpg)
I was told that the Pulsar flywheel would not fit in the FWD Sr20 tranny. The holes in the flywheel do not mate with the holes in the Pulsar crank, but a machine shop was able to open them up. It worked perfectly. Additionally, I decided to have the main bearing journals replaced, and the crankshaft Nitrate-Treated to reduce the likelihood of cracking.
![[Image: Motor%20Mount.jpg]](http://home.san.rr.com/gtirg20/Motor%20Mount.jpg)
The stock motor mount does not line up with the holes on the GTi-R motor, notice the top hole of the bracket is not lined up.
![[Image: Motormt.jpg]](http://home.san.rr.com/gtirg20/Motormt.jpg)
But a little trimming with the Dremel and it fit snug.
![[Image: Belt.jpg]](http://home.san.rr.com/gtirg20/Belt.jpg)
I thought I'd replace the drive belts, however the Pulsar belt was significantly smaller. I ended up getting a new Pulsar belt for it. Trust me, it won't fit. Not a bad idea to order two, incase you ever need to replace this belt again.
![[Image: Holy.jpg]](http://home.san.rr.com/gtirg20/Holy.jpg)
Because the Pulsar motor is 4wd, the car has additional supports built into the aluminum upper oil pan. These need to be "trimmed" in order for the cross-member to fit. I had this done professionally.
![[Image: ghetto.jpg]](http://home.san.rr.com/gtirg20/ghetto.jpg)
This is my super ghetto method of plugging the resulting hole in the pan. This is crucial because you don't want water to flood the clutch/flywheel if you hit a water puddle.
![[Image: o2.jpg]](http://home.san.rr.com/gtirg20/o2.jpg)
The O2 sensor that came with the car was damaged during delivery. I found a compatible Nissan sensor, it was off a 300z, I forget the year. I have the part number somewhere.
![[Image: seal1.jpg]](http://home.san.rr.com/gtirg20/seal1.jpg)
After a full day of gently wrestling with this seal, I found that the "screwdriver" the manual suggested faired poorly at actually removing it. Needle nose vice grips did in 10 seconds, what a screwdriver could not. Don't believe everything you read.
![[Image: seal.jpg]](http://home.san.rr.com/gtirg20/seal.jpg)
Stupid seal
![[Image: Seal2.jpg]](http://home.san.rr.com/gtirg20/Seal2.jpg)
I had an equally difficult time trying to get this seal installed without damaging it. I don't know what that shadow could be.
![[Image: TPSplug.jpg]](http://home.san.rr.com/gtirg20/TPSplug.jpg)
The TPS wires needed to be switched. I snipped and spliced the stock harness. You just have to reverse two wires. I don't recall, but I believe they were color-coded.
![[Image: Eng.jpg]](http://home.san.rr.com/gtirg20/Eng.jpg)
I couldn't find a plug that would fit on this purple sensor. I believe it was for the idle up. I ended up just soldering the wires directly to the sensor. Worked.
![[Image: idleup.jpg]](http://home.san.rr.com/gtirg20/idleup.jpg)
Here is what it looked like when I was done.
![[Image: Clutch.jpg]](http://home.san.rr.com/gtirg20/Clutch.jpg)
A must for this swap, a clutch/flywheel combo. I chose a Southland dual friction clutch, mated with an ACT street pressure plate. The clutch broke within 4 months, and the Pressure plate I think was to blame. Southland clutch was of course very generous, and repaired the broken clutch for me no problem. I have always had good luck with that company. Notice I started fitting a small front mount intercooler. I ended up repositioning it lower, so it sits flush with the bottom of the frame.
![[Image: Bracket.jpg]](http://home.san.rr.com/gtirg20/Bracket.jpg)
I used the Pulsar ECU bracket to make mounting brackets for the intercooler. I used the ripples in the metal to further support the weight of the IC.
![[Image: ic2.jpg]](http://home.san.rr.com/gtirg20/ic2.jpg)
Here it is with the steel bumper in place. At this point, the engine is in the car.
![[Image: ic.jpg]](http://home.san.rr.com/gtirg20/ic.jpg)
Another shot of the brackets on the bottom.
![[Image: Incar.jpg]](http://home.san.rr.com/gtirg20/Incar.jpg)
Due to the IC plumbing, it was clear that the battery would have to be relocated to the trunk, I used some 1-gauge wire for this, and a plastic battery box for this task. Looks great in the trunk, and allows me to have less wire for my stereo.
![[Image: incar2.jpg]](http://home.san.rr.com/gtirg20/incar2.jpg)
Here's a picture of it in my car. I had to make a custom bracket in order for the throttle cable to function. Once again I used the ECU bracket for this. Notice where the aluminum pipe coming out of the turbo goes to. This points to the entry of the stock IC. Of course this had to be modified to fit front mount.
![[Image: incar3.jpg]](http://home.san.rr.com/gtirg20/incar3.jpg)
The charcoal canister doesn't really fit too well; I had to rig it so that it would stay put. The power steering ended up leaking really bad as well, however I don't think I could put the USDM one on in place. Or possibly I chose not to because my old one didn't work. I don't remember.
![[Image: pwrstrng.jpg]](http://home.san.rr.com/gtirg20/pwrstrng.jpg)
Notice the awkward angle of the power steering hose, may have something to do with its failure. If anyone knows a hose that fits this without alteration, please let me know. In the meanwhile, I have grown fond of not having power steering. (Yeah Right)
![[Image: Pipeturn.jpg]](http://home.san.rr.com/gtirg20/Pipeturn.jpg)
Here is the solution to the problem; what do I do to get this hose pointed the right way. Cut it off, rotate and reattach it. This way the turbo oil feed hose still has the stock support in place.
![[Image: pipecut.jpg]](http://home.san.rr.com/gtirg20/pipecut.jpg)
I decided to run the IC pipe through this hole. The stock airbox used to come through here. I widened it just enough to fit 2 pipes of 2' diameter. I spray painted a template onto this section. I know it's ghetto, but nobody can see this part anyway.
![[Image: support.jpg]](http://home.san.rr.com/gtirg20/support.jpg)
These little things got in the way of the intercooler, so I ripped them off. They held on a part, which kept the bottom of the bumper in good form. Wish Nissan would of put some of these in the upper corners of the bumper, mine are sagging like a pair of old woman's breasts.
![[Image: Frontmt.jpg]](http://home.san.rr.com/gtirg20/Frontmt.jpg)
Here is another shot of the IC installation. You can see the air intake on the toolbox on the floor. The Intercooler piping was very tricky, but when it was done, worked great. The only shortcoming is the length. I would have run a pipe through each fender of the car, for a shorter length, however the ABS was very much so in the way of this. I have an idea for a shorter length of piping, which will allow for a slightly larger diameter. I will post pictures if and when I implement it. To fabricate the piping, I simply used a ruler to find the tangent lines of the pipes, and connected them with a straight edge. I bought a pipe cutter from home depot, and a bunch of cutting bits. (I needed a bunch) I still have yet to weld them, it's held together with these connectors to this day. (I really really really do not advise this) I have not had it welded because I plan to change it around.
![[Image: Icpipe.jpg]](http://home.san.rr.com/gtirg20/Icpipe.jpg)
This is what my piping looked like when I was done. It is still like this today as well. Over a year after the installation. I know I know, ghetto. Oh well, it works.
![[Image: Eng2.jpg]](http://home.san.rr.com/gtirg20/Eng2.jpg)
Here I started on the upper section of the Intercooler piping. The air intake that goes between the MAF and the Turbo intake was an SR20 Development special. They helped me immensely throughout my installation.
![[Image: Downpipe.jpg]](http://home.san.rr.com/gtirg20/Downpipe.jpg)
The final touch to the plumbing was this custom piece, a loaner from SR20 Development. It has the flex tubing positioned just right. Notice the Oil Pan is all scratched up. It was from dragging the engine around on it before I installed it. I ended up taking it off and pounding it flat again after I bottomed out a month later. SR20 DET engines are known to occasionally fail shortly after installation. I of course wanted to avoid this, which is why I made sure the OIL pickup was clearing the oil pan before I installed the engine. Also why I had the main bearings replaced.
![[Image: Pan.jpg]](http://home.san.rr.com/gtirg20/Pan.jpg)
This is the way I fixed that problem
![[Image: Stuffed.jpg]](http://home.san.rr.com/gtirg20/Stuffed.jpg)
A photo of the garage during mid-installation. It was a very tight squeeze.
![[Image: Dropping%20Resistors.jpg]](http://home.san.rr.com/gtirg20/Dropping%20Resistors.jpg)
The injectors that come on the Pulsar require dropping resistors to be installed. This is what my installation looked like. I held the wires in place using small zip ties.
![[Image: Fuel%20Pump.jpg]](http://home.san.rr.com/gtirg20/Fuel%20Pump.jpg)
This is the first attempt I made at fitting the larger 300z twin turbo fuel pump into the stock housing. This did not come close to fitting.
![[Image: Fuel%20Pump2.jpg]](http://home.san.rr.com/gtirg20/Fuel%20Pump2.jpg)
This is take two
![[Image: Fuel%20Pump%203.jpg]](http://home.san.rr.com/gtirg20/Fuel%20Pump%203.jpg)
This is what I ended up doing. The screened section at the end is pressed against the floor of the fuel tank, so I did not use a clip or retainer to keep it on.
![[Image: Support1.jpg]](http://home.san.rr.com/gtirg20/Support1.jpg)
And for the finishing touch, I had to do something to make the trunk close. Surprisingly, this bracket from the EGR on the stock SR20 fit perfectly. I know I know...
![[Image: Intercooled.jpg]](http://home.san.rr.com/gtirg20/Intercooled.jpg)
Done, and it only took two months. Vrrrooooom .Pssshhhhh!!!
I ended up adding a HKS Sequential BOV, and am buying a fat big brake set up as well. I will post installation photos of that as well.
manque plus qu'une personne qui parle bien la langue de moliere traduise pour que tout le monde puisse comprendre meme si c'est pas bien compliqué se qu'il y a d'ecris
aller a vos swap


![[Image: sanstitre16iy.jpg]](http://img58.imageshack.us/img58/8751/sanstitre16iy.jpg) [|]
[|] ![[Image: sanstitre0cy.jpg]](http://img58.imageshack.us/img58/882/sanstitre0cy.jpg)
![[Image: red1fi5.png]](http://img154.imageshack.us/img154/5449/red1fi5.png)


![[Image: choro_NX.jpg]](http://www.klg-design.com/ftp/choro_NX.jpg)
 MEMBER

![[Image: 334020.png]](http://images.spritmonitor.de/334020.png)